Annie Sloan Chalk Paint
Directions:
-
Annie Sloan Chalk Paint glides easily over any surface -
- Glass
- Cement
- Wood
- Ceramic
- Remove wax by wiping with mineral spirits
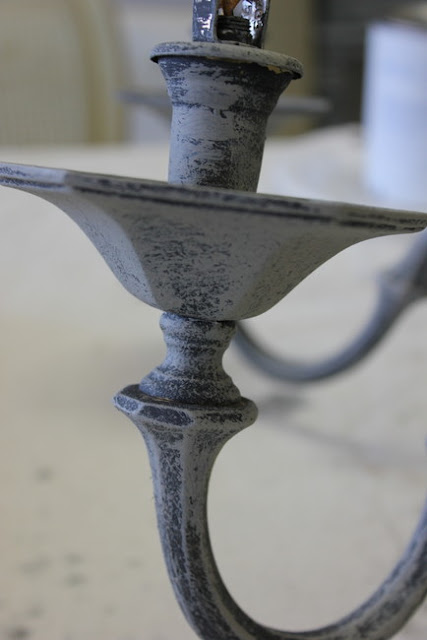
- Paint chandelier with Chalk Paint® by Annie Sloan in Graphite
- The Chalk Paint® sticks nicely to the brass without any prep-work.
After doing one coat over the chandy I moved to the next step....
-
I whisked some French Linen Chalk Paint® across most of the Graphite.

- Then I used my magic potion...Pearl Plaster!
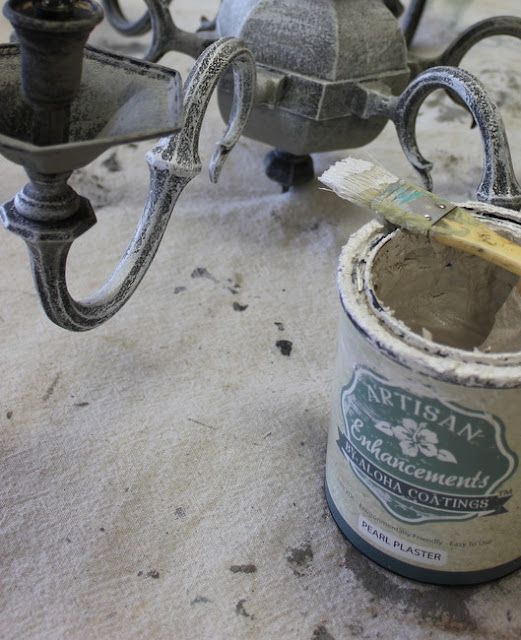
-
I brushed the Pearl Plaster over the painted finish and
made it heavy and crusty in some areas and sheer in others.
-
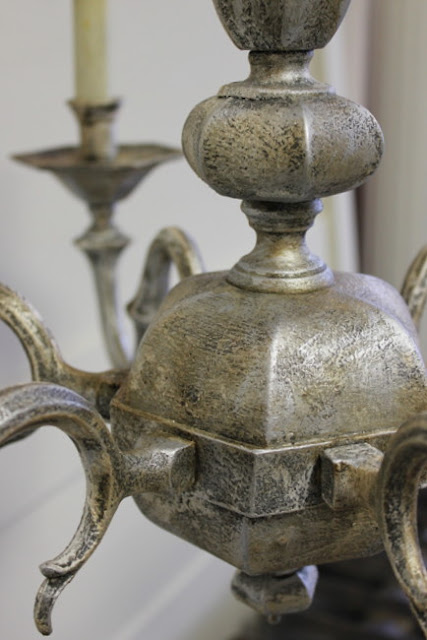
Finished up with a little dark wax and now it has a a whole new look!

- Something kind of hand forged looking....
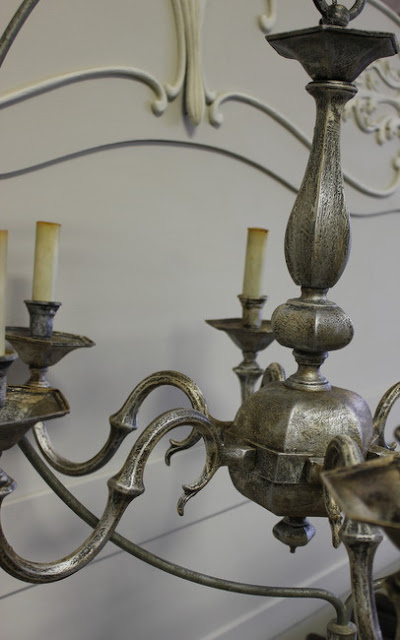
- Some black candle covers and this baby is good to go! So consider Chalk Paint® for your brass pieces and add a little Artisan Enhancements~Pearl PlasterPearl Plaster for that shimmery but not sparkly look.
Painting Furniture
- a piece of furniture to paint
- a drop cloth or plastic
- chalk paint
- a good paint brush
- water
- clean rags
- sandpaper or sanding block
- basic tools*
- tape*
- wax*
* optional items depending on what you're painting
Here's what to do:
- Set up a work area with a drop cloth and the piece you're about to paint. There are no fumes with chalk paint, so it's perfectly safe to paint indoors.
- Wipe down your piece with a damp rag so you have a clean surface. Take out drawers or any other parts of the furniture that should be painted separately, and remove any hardware, knobs or hinges.
- If you are painting near fabric or an area that you want to keep free from paint, make sure to tape off the paint free areas. For instance, I like to tape around drawer edges since I don't usually paint the sides of the drawers. This helps give nice clean lines.
- I usually start with the underside of the furniture. It's the area that matters least and it gives the painter a chance to get used to the paint.
- You can paint directly from the can or in a separate container. But in either case, give the can a good shake before using it.
- When starting out, I recommend using a separate container so you can play with the paint a little bit. This is the easiest way to determine the texture that fits your personal taste. You can leave it exposed to the air and it will get thicker, or you can add water to make it thinner… or, of course, you can use it as it comes. Just remember to put the lid on the paint can while you play, so the full amount of paint doesn't get too thick.
- Dip your brush into the paint, about a third of the way… and start painting. If you feel like it's a little too thick just add in a little bit more water until you're comfortable.
- Once you like the coverage and the thickness of the paint, keep going until you've finished your first coat.
- Sometimes, one coat is enough, especially with the darker colors. In other cases you may need two coats. But very rarely three.
- Chalk paint dries quickly, especially outside. So chances are, the first coat will be dry by the time you're ready to start the second.
- After the second coat, give the paint a little bit of time to thoroughly dry… a couple of hours is plenty… and then decide how you're going to finish it.
- If you decide not to distress the furniture, I would suggest leaving it over night to really let the paint cure before doing anything else. Then you can wax. It's easy for the paint to rub off a little, during the waxing process, if the paint isn't entirely cured. If you decide that you DO want to distress, just make sure the paint is dry and you're ready to go.
- There are two different ways to distress your piece.
- You can use a damp rag and rub the paint off in random places until you get a look you like, and then wax
- You can wax first, and then use a sanding block or some sandpaper to distress. You can use sandpaper beforehand if you like. But sanding can be messy and waxing often rubs off a little more paint naturally, so don't overdo it with the sandpaper before waxing. It may sound counterintuitive to wax first, but it makes the sanding dust a lot less messy.
- And speaking of wax… it's not mandatory. But I highly recommend it to protect your finish and to deepen the color of the paint. Waxing is sort of like icing a cake… to me it doesn't feel quite finished without it.
- When you're finished with the look you want, wipe down the piece again, and see what you think. You may want to add more wax. But usually one coat is enough.